What are the reasons why you want to learn DJing?
When you’ve perfected your skills, it’s time to sit back and enjoy the fruits of your labour. The following are reasons why being a DJ is so cool:
It’s a fun job
If you think about it, DJing is a job where you are paid to play your favourite music for other people. You don’t have to waste the best years of your life sitting behind a desk from 9 to 5 waiting for retirement to come. DJing gives you the freedom to set your own schedule, make great music whenever you wish and just live life to the fullest.
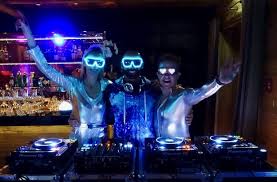
Fame
Being a DJ is one of the ways you can become famous; if you are good at it. Fame boosts your ego, confidence, and generally makes you feel better about yourself as a person.
Industry Friends
When you are a DJ, you get a chance to meet a lot of successful people, including some that you may have idolised before. For instance, you get to meet a lot of famous artists, industry professionals, or other people that maybe want to work with you or book you.
Money
DJing can be a gratifying career if you play your cards right. There are so many ways you can make money as a DJ; playing at weddings, nightclubs, corporate events, parties, making music, among many other ways. Some of the biggest names in the DJing world make six figures for just a single night’s work. Even the regular DJs can make more than what the average 9-5 worker makes.
Free Drinks
Who doesn’t love free stuff? The answer is nobody. As a DJ, you will never have to pay for a drink when playing at a club or event. Most clubs buy you enough drinks to get you through the night and even if they don’t, a drunken fan will save you from having to pay $500 for a $50 bottle of vodka in a Manhattan club.
It gives you joy
There is no better feeling for a DJ than seeing people enjoy and dance to the music you are playing for them. It shows you are fulfilling your purpose, which is to entertain. It is the same feeling as receiving compliments from friends when playing your music for them in the car but on a much larger scale.
How to Craft a Good DJ Set
A good DJ set is like a story with ups and downs and twists and turns. Here are a few tips to help you create an engaging set and nail it.
What are the reasons why you want to learn DJing?
When you’ve perfected your skills, it’s time to sit back and enjoy the fruits of your labour. The following are reasons why being a DJ is so cool:
It’s a fun job
If you think about it, DJing is a job where you are paid to play your favourite music for other people. You don’t have to waste the best years of your life sitting behind a desk from 9 to 5 waiting for retirement to come. DJing gives you the freedom to set your own schedule, make great music whenever you wish and just live life to the fullest.
Fame
Being a DJ is one of the ways you can become famous; if you are good at it. Fame boosts your ego, confidence, and generally makes you feel better about yourself as a person.
Industry Friends
When you are a DJ, you get a chance to meet a lot of successful people, including some that you may have idolised before. For instance, you get to meet a lot of famous artists, industry professionals, or other people that maybe want to work with you or book you.
Money
DJing can be a gratifying career if you play your cards right. There are so many ways you can make money as a DJ; playing at weddings, nightclubs, corporate events, parties, making music, among many other ways. Some of the biggest names in the DJing world make six figures for just a single night’s work. Even the regular DJs can make more than what the average 9-5 worker makes.
Free Drinks
Who doesn’t love free stuff? The answer is nobody. As a DJ, you will never have to pay for a drink when playing at a club or event. Most clubs buy you enough drinks to get you through the night and even if they don’t, a drunken fan will save you from having to pay $500 for a $50 bottle of vodka in a Manhattan club.
It gives you joy
There is no better feeling for a DJ than seeing people enjoy and dance to the music you are playing for them. It shows you are fulfilling your purpose, which is to entertain. It is the same feeling as receiving compliments from friends when playing your music for them in the car but on a much larger scale.
How to Craft a Good DJ Set
A good DJ set is like a story with ups and downs and twists and turns. Here are a few tips to help you create an engaging set and nail it. So, you’ve got the basics of DJing down and are looking to record a set. You want to do this to promote yourself and get gigs, or you’re about to play your first show. There are no absolute rights or wrongs with DJ sets. They will differ depending on what genre or kind of event you are playing. A good DJ set is like a story. It has ups and downs and twists and turns, all while taking the listener on a journey. Here are a few tips to help you create an engaging set and nail it.
Starting with a Clear Concept
You might be playing a club set within a certain genre. Maybe you’re doing a set for a wedding, birthday, or awards night. Either way, think about who will be listening to the set. What kind of vibe will the gig have?
This will help you to narrow your track choices to a selection that creates the right atmosphere. Part of creating this vision is knowing your audience. If you’re playing at a club, think about your time slot. Where will the audience be in their journey at that time of night?
Generally, people aren’t ready to go to full energy as soon as they walk into the club. Also, think about who you’re playing before and after. What is their style? How can you provide a complement to the headliner?
Plan Your Opening
It’s good to have your first five tracks set out. This helps to set up the vibe that you’re looking to set with the listeners. At a live event, you may change from your original plans based on crowd reactions. You might also get into the flow and deviate in the moment. Regardless, it’s good to establish the vision for your set right at the start.
Be Prepared
Set up your crates or playlists for the set. You want to be able to access what you need in the moment, without having to scroll through your entire library. Try creating sub crates with particular sub-genres or changes.
It’s often a good idea to include a few throwback tracks in your mix. These give your set a more personal touch, as well as giving your crowd that “nostalgic high.” Or, have a few tracks that are half or double your main BPM. Always group these into sub crates for quick access and make sure they don’t clutter up your core playlist.
Before you perform, listen to every track in your crate. Get to know the breakpoints. These are moments with a transition, breakdown, or shift in direction. Get to know the intros and outros for each song and set up some hot cues to give you quick access to these during your DJ set.
Phrasing
Phrasing is a term used to describe the act of lining up two phrases in a mix. Most western music uses 16 or 32 beat phrases. These are key to a smooth transition, where one track finishes its phrase as the new one starts. It’s a common mistake to have BPMs matched but drop the new track too early or too late. This can create a lull in the mix where nothing is happening. Or, if the new track drops too early it will be messy and you might have overlapping vocals.
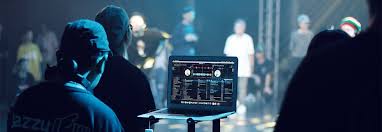
Structure
Listen to your tracks in advance. Then, you’ll know the structure and phrasing for each song and be able to line them up. Software such as Serato DJ is perfect for this, as you can see the waveform laid out. The darker parts will show where there is less going on. The different colors will display the pitches of each part of the track.
The Ramp
This is where the DJ slowly increases the energy throughout your set. You can do this by with energy levels in songs and by increasing BPMs. This is great if you are playing before a headliner and want to build to the peak of the night. But it might not work so well at four in the morning.
The Wave
Here, the DJ creates peaks and troughs to give the crowd ups and downs throughout the mix. This keeps your audience interested and is a great technique for making mixtapes. By allowing the energy to drop, you have space to bring in a higher energy track. You can snap the listeners’ attention back to the mix without ever getting too extreme.
Study Some Basic DJing Skills
You can learn some basic DJing skills on your own, thanks to the wonders of the internet. A few key points that may serve as a good launchpad include the following:
- Beatmatching. The basic idea of beatmatching is to line up two tracks playing at the same tempo and phase.
- Phrasing. Phrasing refers to mixing your tracks together at points that make sense to you.
- Gain Control. This factor revolves around various aspects of volume adjustment.
- EQing. With EQing, you are cutting or boosting frequencies to allow multiple audio tracks to blend seamlessly.
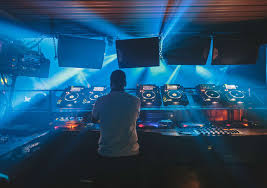
What Equipment Do You Need As A Beginner Dj?
Before we go further, here’s a basic overview of the main pieces of equipment in a DJ setup, whether it’s in the home or a nightclub:
- Decks: The things you play music on. Two or more are connected to a mixer.
- Mixer: The unit that enables you to play music from two or more decks so your audience can hear it all at the same time.
- Monitor speakers: It’s important to have these so you can hear what your audience is hearing.
- DJ headphones: You’ll need these to listen to the next track you want to cue up without playing it through the speakers.
What Makes Dj Headphones Different?
Often when people get into DJing, they’ll use any pair of headphones they happen to own already. But if possible, it’s well worth buying a good pair designed specifically for mixing – even for your first setup. DJ headphones have a number of characteristics that make them more comfortable and can even help you improve your performances.
- Durability: DJ headphones are built to withstand the heavy wear and tear that comes from constant travel and performing long sets in dark, chaotic clubs. A good pair will last for years if you look after them.
- Sound insulation: Effective sound insulation blocks out the ambient noise around you so you can focus on the details of your mix.
- Functionality: Most DJ headphones include a number of features that enable you to transport them easily and wear them comfortably for long periods. With a flexible headband and earcups that swivel, you can wear your headphones in various ways. For example, you might keep them on your head or drape them around your neck, sometimes with one earcup on the ear and the other one off, so you can hear the next track as you mix it in via your headphones while also listening to the track the audience can hear through the speakers.
- Sound quality: DJ headphones offer rich sound so you can pick out all the details in your music and know exactly what the audience will hear when you play your next track. Being able to clearly hear the bass and kick drum, or monitor the frequencies that you’ve isolated from the rest of the track via the mixer, will help you to mix with precision.