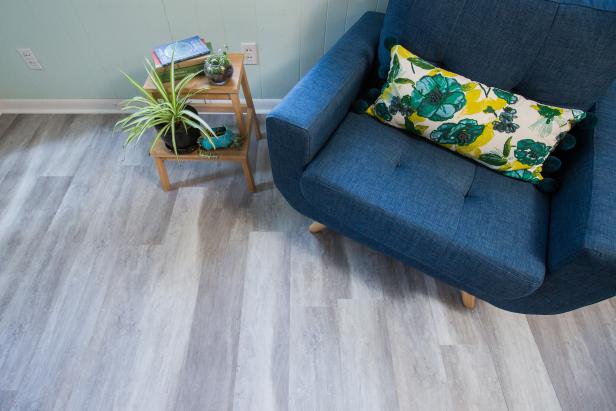
How to Install Snap-Together Laminate Flooring
If you’re looking for budget-friendly flooring that stands up to kids and pets, laminate is a great option. Learn how to easily install snap-together laminate flooring in your home.
Whether you’re looking to replace your dated carpet, turn your garage into an apartment, home office or gym, or you just need a quick, inexpensive way to cover up an existing floor, snap-together laminate flooring is a great solution. There are plenty of styles to choose from, and nearly all are budget-friendly, durable and easy on the eyes.
Buy Flooring
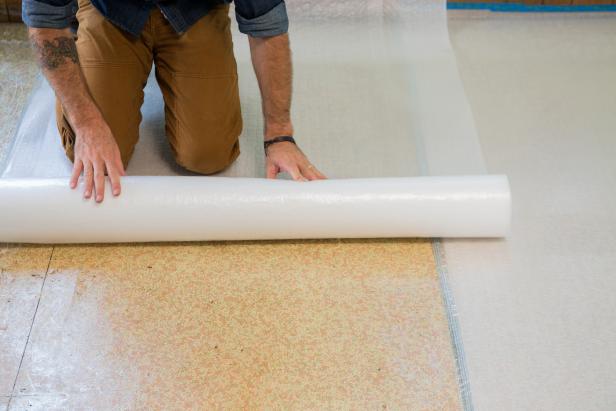
Ideally, you should have your new laminate in your home ahead of installation day to allow it to acclimate to your home’s environment for at least 48 hours. This will help prevent warping after installation. To figure out how much you need, multiply the room’s width by its length to find the total area, then tack on an extra 5 to 10 percent to account for cuts and mistakes.
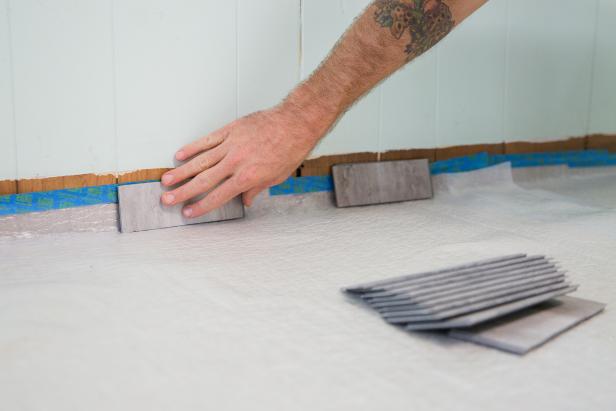
Install First Row of Flooring
Use small sections of planks as spacers to hold the flooring away from the wall about 1/4 inch. The spacers will allow for natural expansion to occur around the perimeter of the floor after installation. Using a table saw, rip the boards for the first row to remove the tongue. This ensures the true edge of the board will rest against the spacers, so the expansion gap will not be too large for the baseboard to cover. Install the first row against the spacers both on the side and end. Trim the last plank to length to fit so that it ends 1/4 inch from the wall.
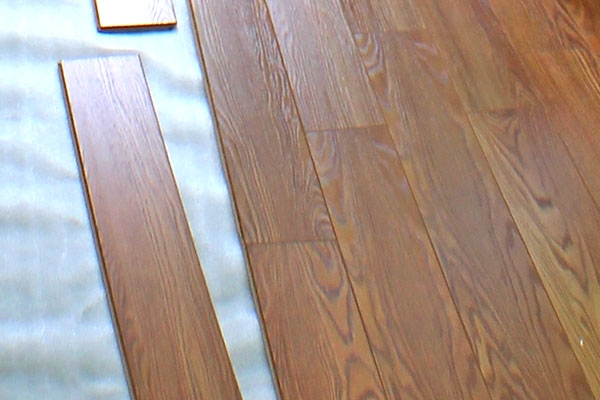
Continue Installing Floor
Use the short trimmed section of the previous row to start the next row. This will ensure the joints between planks in a row are staggered from the joints in adjoining rows. The laminate flooring in this project has a soundproof backing and wood finish. It snaps together by lining up at an angle and then flattening out the row being installed. To save the edges of the flooring boards, use a tapping block or rubber mallet to tap adjoining rows together. This will prevent damage to the tongue or groove from the hammer.
Can it be used on laminate flooring and does it do a good job? Streaks ect
As far as laminate flooring goes that depends on its quality. Most of the cheaper laminates are made of MDF ( medium density fiberboard ) and it is not good stuff when it get wet. If you have quality you should have no problems. Maybe try a small discreet area first. With regard to this product, it is a god send. I purchased this for my wife to make life a bit easier cleaning the floors, but I use it more than her as I just love how well and fast it cleans our floors. We have tile, solid wood and laminate floors, the main floor that has the worst traffic and dirt is our kitchen
It is a off white wood grain effect long tile, that attracts stains like no ones business. People, dogs, and more importantly dog hairs ( oh my god endless hairs ) food spills and everyday grime lands on this floor and the vacuum mop is truly amazing at cleaning up picking up dirt. Truthfully I am amazed at just how good it really is. It picks up all the dirt even up close to baseboards and even with larger debris like my dogs biscuits. The cleaning solution works really well, and if you come to tough stains simply wiggle handle side to side and it shakes the head for and even better scrubbing action.
I find myself keeping the water trigger on most of the time as it does a great job picking everything up. But if you have excess water on floor simply let go of trigger so it can vacuum up the excess. It’s not like the floor is soaked and like a bath tub, I suppose I’m just trigger happy and want my floors clean. I actually just cleaned my kitchens few hours ago, and after like 5-10minutes it is completely dry, and absolutely NO STREAKS.
One last thing that I love best is that no matter how dirty or in my case how endless the dog hairs are this vacuum mop picks it all up and cleans at the same time. No more broom and pan first. Oh and it super easy to take apart and clean. Sorry to ramble, but I know you’ll love it as much as we do. I hope this helps.
Tips for Maintaining Laminate Floors
Laminate floors are tough and resilient, easy to care for, long lasting, and beautiful. If you treat laminate floors right, they will reward you with many years of utility and pleasure
1. Lift don’t drag. Laminate floors are scratch resistant, but not scratch proof, so never drag or push heavy furniture or appliances across laminate floors. Instead, use a dolly or hand truck to move heavy items or lift and carry them.
2. Help floors and furniture coexist in peace. Use rubber casters or soft pads (stick-on felt pads are a good option) to protect laminate floors from furniture damage. Also, slightly reposition furniture occasionally.
3. Humidify, if necessary. Excessive expansion and contraction of laminate flooring as a result of wide swings in temperature or humidity can cause gaps in the joints between floor boards or even buckling. Therefore, if you live in an area with wide variations in humidity, you may want to use a humidifier to maintain a consistent level of humidity year round.
4. Keep laminate floors dry. If liquid of any kind spills on your laminate floor, clean it up immediately, since moisture can seep into the joints and cause long-term damage.
5. Remove stains with care. Always use a soft cloth when removing stains and, if you are scraping up hard-set material like dried food or candle wax, use a rubber spatula. Check with your laminate floor manufacturer for the proper way to remove tough stains like paint, nail polish and ink.
6. Clean regularly. Keep laminate floors clean by sweeping, dust mopping or vacuuming daily or every other day. For more thorough cleaning, follow the manufacturer’s instructions and be sure to check your manufacturer’s warranty for any maintenance requirement or limitations. For example, you may have to follow a specified maintenance schedule or use certain cleaning products to comply with the terms of the warranty. You may be able to buy a laminate floor cleaning kit from the manufacturer, but there also are effective general-purpose laminate floor cleaning products on the market. Never use soap or abrasive materials on laminate floors.
7. Don’t wax. If properly cleaned, laminate floors should retain their shine without waxing. In fact, waxing laminate floors can be counterproductive, since it will dull their luster.
8. Use door mats and consider a no-shoes policy. Dirt, gravel and other abrasive materials on the soles of shoes can take a toll on laminate floors over time. Therefore, be sure you have heavy-duty mats at all entrance doors so that shoes can be cleaned thoroughly whenever anyone enters your home. You also might consider a no-shoes policy indoors, especially for family members.
9. Keep pets nails trimmed. If you have dogs and/or cats, keep their nails trimmed to avoid scratches to the surface of laminate floors.
10. Repair with care. Damage to laminate floors usually can be repaired. Whether you can do it yourself or need the help of a professional will depend on your do-it-yourself skills and the magnitude of the damage. Surface scratches can be touched up easily using repair kits containing silicon filler and colored wax sticks. Repair kits are sold by laminate floor manufacturers. More extensive damage may require replacing boards. If you plan to tackle board replacement yourself, first check with the manufacturer for instructions and tips on how to complete the process.
Tips for DIY flooring projects: Everything you need to know
Replacing the floors in your home is a surefire way to give your space a fresh, new look. At the same time, purchasing quality flooring and hiring an experienced professional can get pricey — fast
If you’re craving a new floor and aren’t afraid to go DIY, attempting your own flooring project can save you lots of money. Of course, it can also turn into a huge mess if you don’t do all the research first. To save you from a major headache, TODAY Home consulted the pros to find out exactly what you need to know before starting your own DIY flooring project.
DIY flooring isn’t for the faint of heart
Looking up DIY flooring ideas can be fun, but make no mistake: Installing a new floor isn’t easy. “Even relatively simple materials, like vinyl or laminate, require a lot of careful calculations and precision cutting for the patterns to be just right,” said
Then again, if you’re up for the challenge and don’t mind doing your research, learning how to install floors can pay off. “An intrepid DIYer who tackles the project could save hundreds, if not thousands of dollars,”
Before you get ahead of yourself, though, make sure you spend plenty of time poring over how-to videos and deciding which type of flooring will work best in your home.
Best Laminate Flooring
What is the best laminate flooring? Which ones should be avoided? We’ve got the answers in this guide to the best laminate brands and ones that aren’t worth the money – unless cheap laminate is exactly what you want.
Are they tied? Yes, but there’s more to the connection. Mohawk and Pergo share identical technology at their core. was the original laminate flooring, introduced to the world in 1979. Mohawk acquired Pergo in 2013.
Quality Construction: Everyone makes attractive laminate. But does it look good 5 years after installation? Are the boards coming apart or cracking? These brands will keep their good looks, at least their midgrade and premium lines
Almost all of the flooring has an AC4 rating for scratches and wear, which means it is suitable for residential and light commercial use. Dependable Water-resistance: The construction allows you to wet mop your Mohawk or Pergo flooring without fear of damage. Use it in the kitchen or bathroom or basement. It will be OK.
Large and Varied Selection: Mohawk has nearly 150 laminate options in smooth and textured varieties. The Pergo selection isn’t as large, but it is more diverse with laminate in handscraped, textured, smooth and “natural authentic” lines. Natural Authentic is an enhanced texturing that really gives the flooring a true-wood look.