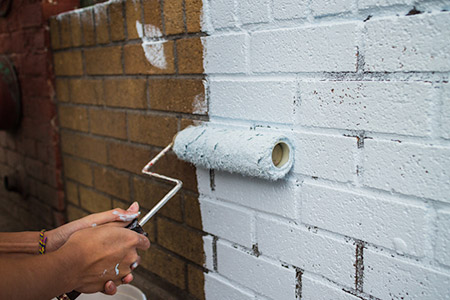
HOW TO PAINT BRICK
From time to time, brick surfaces, whether they are outside or in, need to be refreshed. You shouldn’t be afraid to use paint on brick. It can be used to complement interior and exterior color schemes, or to hide old, weathered and beaten bricks. You just need the tools and know-how to get the job done. Keep reading to find out how to use this DIY painting guide.
Prep the Brick for Painting
Both interior and exterior brick should be prepped before painting. If you’re painting your brick fireplace, for example, remove all items from around the work area, such as fireplace screens and tools, and mask any area that you don’t want paint on using painter’s tape. Place drop cloths on the floor and secure them in place using painter’s tape. Clean interior brick with water, mild detergent and a scrub brush. Let the wall dry completely before painting.
Outside, remove all window screens, light fixtures, plumbing outlets, electrical covers, shutters and address numbers/placards or cover them with painter’s tape before you begin. Use drop cloths to cover cars, patio furniture, shrubs and anything else you don’t want to splatter with paint. It’s a good idea to cover the ground so you don’t get paint on walkways and on the grass. Also, be considerate of your neighbors’ properties while painting.
Remove dirt, debris and mildew with water from a garden hose or by pressure washing with water and a mild detergent. Using a pressure washer is the most effective method of cleaning because of its ability to blow dirt and debris out of the tiny crevices and pores in brick. Note: Use a low setting when pressure washing so as not to etch or otherwise damage the brick.
Choose the Right Paint
When painting exterior surfaces, it is recommended that you use latex paints, which have higher durability on exterior surfaces than oil-based paints. Latex paint provides better fade resistance, flexibility, chalk resistance and adhesion. When you’re painting brick
How to Paint the Perfect Wall
Unlike retiling your kitchen floor, painting a room is a doable task that even renovation novices can tackle in one weekend. But before you grab your paintbrush, it’s important to get informed and learn the basics.
Prep the Walls
Before you open a paint can, inspect your walls for cracks, holes or stains. “First, look at the wall and see if there are repairs that need to be made,” says. “Fill holes from things like pictures and peel away areas of chipping paint.” Next, lightly sand any patched areas to ensure there are no ridges left from applied spackling and use a tack cloth to clean up any dust from sanding.
“You can spot prime those patched or repaired areas but a primer on its own is generally unnecessary,” says. “I would recommend priming an entire wall if the surface is in bad shape or stained.” However, a “clean, or recently painted wall” doesn’t need to be primed, the pro says, especially if you’re using a high-quality paint-and-primer-in-one, which saves you time and money.
Protect your Goods
Once your wall is in good shape use painter’s tape to protect baseboards and other areas like moldings, door and window casings, light fixtures, and switch plates. “I’m a big fan of the ScotchBlue Painter’s Tape
Pick Your Tools
He suggests looking for the label “shedless” when it comes to rollers. All and all, a painter’s tool kit should include: sandpaper, painter’s tape, drop cloths, paintbrushes like the Wooster Pro brush, paint roller, paint roller extension pole, paint tray, and the paint color of your liking.
Previously Painted Exterior Walls
If your exterior walls have been painted then they will need to be maintained. This is a big job that requires a lot of planning and thought before you start to ensure that you have all the necessary tools and equipment before you start. A high level of surface preparation is essential if the job is going to look good and last a long time.
Essential tools and preparation advice
If the surface is very bad then it may be necessary to wash some of it down first with a detergent solution to remove dirt, grease etc. Obviously this is not an easy thing to do on the outside of a house, but it will help give the best results. Rinse off with clean water and allow too dry.
Carefully scrape back to a firm edge all areas of poorly adhering or defective coatings and rub down thoroughly to “key and feather” broken edges of existing coatings. Don’t use a wire brush as bits of the wire may break off embedding themselves in the surface, which may rust when the water-based paint is applied. Treat any areas affected by mould, lichens, algae and moss with Fungicidal Wash. Make good minor defects with an appropriate filler.
Painting advice
If your walls have never been painted then you need to think very carefully about what you are doing if you decide to paint them. Once painted they must be maintained and it is very expensive and difficult to go back if you change your mind. Professional blast cleaning is the only way to do it. Also, a lot of bricks can’t be painted such as Fletton or Common Bricks. Always seek professional advice if in doubt.
Stripping Wood: There is no need to strip existing paint coatings unless they are in a very bad state. It is always better to continue painting and build up the surface than to start again from bare wood
PROS AND CONS OF PAINTING YOUR BRICK HOUSE
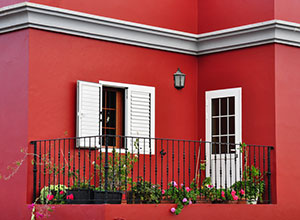
You may have noticed painted brick homes are having a bit of a moment. You’ll even see it on the Home! Brick is extremely versatile and enables houses to look both traditional and modern depending on its treatment. But how can you know if its right for your home?
Painting the brick on your house is a nice way to hit refresh without making major (structural) renovations. You’ll need to ask yourself if your house needs such an update, if you’re willing to put in some maintenance/finances, and what kind of style you’re going for.
WHAT ARE THE PROS OF PAINTING OR COVERING BRICK?
Painting your brick house is a relatively easy way to give your house a new look, especially if the exterior is looking outdated.
Painting your house can add uniformity and a clean look natural brick can’t always do. If you do decide to paint the brick on your house, be sure to use a breathable paint such as silicate or mineral-based (more on that in the next section).
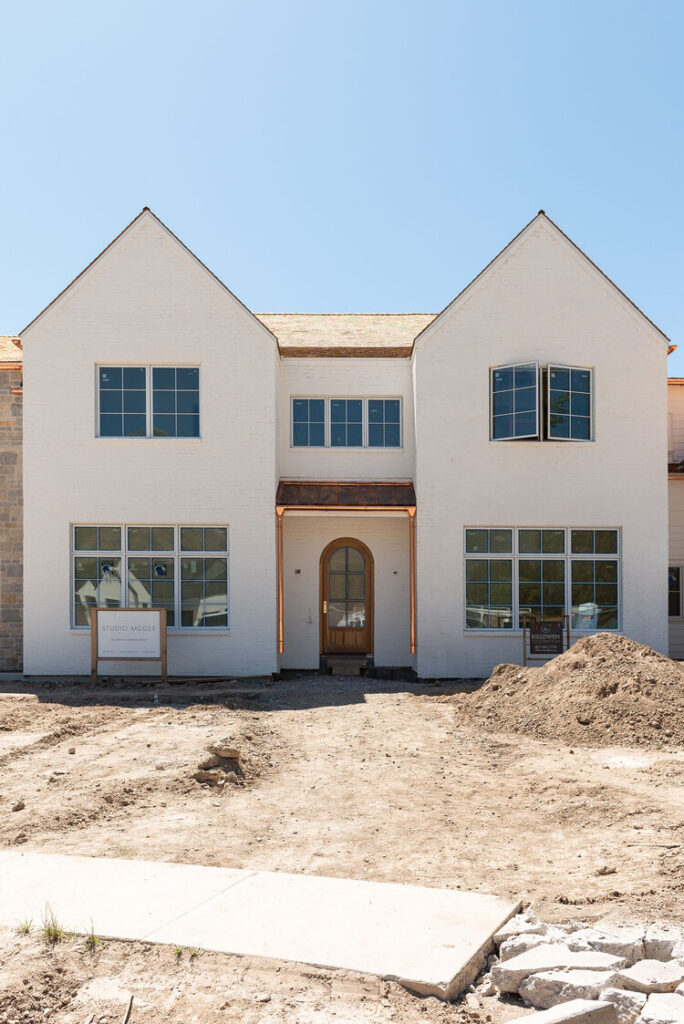
PAINTED BRICK INSPIRATION:
If you’re ready to make the jump here’s some painted brick homes that nailed it. This gorgeous home employs a muted white color making it look both clean and classic.
Best Paints to Use for Outdoor Furniture, Accessories and Pots
Living in the extreme heat and humidity, I have had to learn the hard way what paints work and don’t work. Humidity and moisture are really the biggest enemy when it comes to outdoor paint finishes and there are several fantastic products and techniques that will guarantee that a paint finish will last for several years.
I’m breaking today’s post down into four painting categories; wood furniture, metal furniture and accessories, fiberglass garden pots and wicker/rattan, so you can quickly jump to what you want you need to paint.
Outdoor Wood Furniture
When it comes to painting outdoor wood furniture that will last for several years, the only thing that has worked beautifully for me and has lasted several years in extreme weather is spray paint. The good news is that spray paint is also quick and easy.
The most important part of spray painting outdoor furniture and accessories is the prep work. From my experience, if you do the prep work and prepare a piece properly and use a great spray paint (more on that in a minute), the finish on outdoor wood pieces can last 3-4 years on outdoor pieces.
When I painted my outdoor wood furniture last week, it had been over three years since I last spray painted the pieces. In fact, the furniture and paint conditions were still great and I could have gone another year but I wanted to change the color.